Introduction to Baseboard Molding and Wood Molding
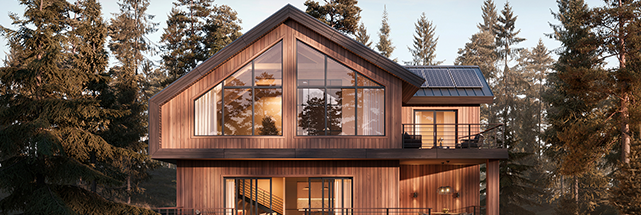
In the realm of interior design and residential construction, few elements possess the transformative power of wood molding. Often referred to as "architectural jewelry," molding serves as the finishing touch that bridges the gap between disparate structural surfaces—walls, floors, and ceilings. Among the various types of interior trim, baseboard molding is perhaps the most fundamental. It is the visual anchor of a room, running along the lowest part of an interior wall to cover the joint where the wall surface meets the floor.
Defining the Essentials: Baseboard and Wood Molding
To understand the scope of this guide, we must first define our terms. Wood molding is a broad category encompassing any decorative strip of wood used to ornament or finish a room. While modern advancements have introduced synthetic alternatives, traditional wood remains the gold standard for its warmth, workability, and timeless appeal. Baseboard molding, specifically, is a type of trim designed to provide a transition between the wall and the floor. It is functional by necessity but decorative by design, available in heights ranging from a subtle three inches to a grand twelve inches or more in historic estates.
The Purpose in Interior Design and Construction
The integration of interior trim is rarely just about vanity. In construction, houses are built with "tolerances"—small gaps left to allow for the natural expansion and contraction of materials like hardwood floors or drywall. Without baseboards, these unsightly gaps would be visible, and the bottom of the drywall would be exposed to moisture and physical damage.
From a design perspective, molding defines the character of a space. It can make a room feel taller, more intimate, or more formal. It provides a sense of "completeness" that is often missing in modern, minimalist builds. By choosing specific profiles, a homeowner can signal a commitment to a particular era of design, whether it be the sturdy simplicity of the Craftsman movement or the ornate flourishes of the Victorian era.
The Multifaceted Benefits of High-Quality Molding
Investing in premium wood molding and professional molding installation offers three primary benefits:
Aesthetic Sophistication: Molding hides imperfections. It covers crooked lines and gaps, providing a crisp, clean border that allows paint colors and floor textures to pop. It adds depth and texture to otherwise flat surfaces.
Physical Protection: Baseboards act as a "bumper" for your walls. They protect the vulnerable lower section of drywall from vacuum cleaners, moving furniture, and foot traffic. Without them, the bottom of your walls would quickly become dented and scuffed.
Property Value: Real estate professionals often note that "millwork sells houses." High-quality interior trim is a hallmark of a well-built home. It suggests a level of craftsmanship and attention to detail that resonates with buyers, often providing a high return on investment (ROI) compared to other cosmetic upgrades.
Types of Baseboard Molding
Selecting the right baseboard molding requires a balance between material durability and stylistic harmony. Because baseboards are subjected to more physical stress than crown or chair rail molding, the choice of material is just as critical as the aesthetic profile.
Categorizing by Material
In the modern market, homeowners are no longer restricted to solid timber. Depending on your budget and the environment of the room, several materials offer unique advantages.
Solid Wood (Pine, Oak, Maple)
Solid wood molding is the traditional choice.
Pine: The most common softwood used for trim. It is affordable, easy to nail, and takes paint well. However, its softness makes it prone to denting.
Oak: A hardwood known for its prominent grain. It is incredibly durable and is almost always stained rather than painted to showcase its natural beauty.
Maple: A dense, fine-grained hardwood. It is perfect for high-end contemporary homes where a smooth, stained finish is desired.
Pros: Authenticity, can be sanded and refinished, high durability (hardwoods).
Cons: Expensive, susceptible to warping in high-humidity areas, requires more skill to install.
Medium Density Fiberboard (MDF)
MDF is an engineered wood product made from wood fibers and resin. It is the most popular choice for painted trim.
Pros: Very affordable, comes pre-primed, perfectly consistent with no knots or grain patterns, and does not warp or expand as much as solid wood.
Cons: Soft and easily damaged by impacts; if it gets wet, it can swell like a sponge and cannot be repaired.
Polyurethane and PVC
These synthetic options are becoming staples in modern home improvement.
Polyurethane: High-density foam that mimics the look of wood. It is lightweight and easy to install with adhesive and nails.
PVC: A hard plastic molding that is completely waterproof.
Pros: Impervious to rot, insects, and moisture. Ideal for bathrooms and basements.
Cons: Cannot be stained (paint only), has a slightly "plastic" feel up close, and can release toxic fumes if burned.
Categorizing by Style
The "profile" or shape of the molding determines the architectural language of your home.
|
Style
|
Description
|
Best Suited For
|
|
Colonial
|
Features a simple, rounded top edge with a stepped profile.
|
Traditional and suburban American homes.
|
|
Craftsman
|
Characterized by flat, square edges and a lack of ornate curves.
|
Bungalows, "Mission" style homes, and modern rustic decors.
|
|
Modern/Minimalist
|
Extremely thin and flat, sometimes recessed into the wall (shadow gap).
|
Contemporary, industrial, and ultra-modern spaces.
|
|
Victorian
|
Tall, multi-layered, and highly ornate with deep grooves and "beads."
|
Historic restorations and formal luxury estates.
|
Detailed Descriptions: Pros and Cons
The Colonial Profile
Colonial molding is the "safe" choice for many developers. It usually consists of a flat body with a decorative "ogee" or rounded cap.
Pros: Widely available, matches most existing trim, easy to clean due to fewer deep crevices.
Cons: Can feel generic or "builder-grade" if not chosen in a substantial height.
The Craftsman (Flat) Profile
Craftsman style focuses on the beauty of the material. It is essentially a flat board (usually 1x4 or 1x6) with a square top.
Pros: Excellent for DIYers as it doesn't require complex "coping" at the corners. It provides a clean, sturdy look.
Cons: The flat top edge acts as a dust shelf, requiring more frequent cleaning.
The Victorian/Regency Profile
These are often "built-up" moldings, meaning they are created by combining two or three different pieces of trim to create a massive, intricate base.
Pros: Unmatched elegance and architectural drama. It hides wall-to-floor gaps effectively in old houses.
Cons: Very expensive, difficult to install (requires expert miter and coping skills), and can make small rooms feel claustrophobic if the scale is wrong.
Types of Wood Molding (Beyond Baseboard)
While baseboards ground a room, other forms of wood molding elevate its architectural complexity by addressing different heights and transitions. A truly sophisticated interior utilizes a hierarchy of trim, where each element plays a specific role in defining the room's geometry. Understanding these variations is essential for a cohesive interior trim design that feels balanced rather than cluttered.
Crown Molding: The Ceiling's Masterpiece
Crown molding is perhaps the most iconic type of architectural trim. It is installed at the intersection of the wall and the ceiling. Unlike other moldings that sit flat against a single surface, crown molding is typically installed at an angle creating a hollow triangular space behind it. This unique orientation allows it to cast dynamic shadows that change throughout the day as natural light moves across the room.
Definition and Uses: Crown molding is primarily used to draw the eye upward, giving a room a sense of grandeur and increasing the perceived height of the space. It acts as the final "cap" on the vertical wall, smoothing the transition to the ceiling. Beyond its beauty, it is also highly effective at hiding structural cracks and imperfections that often form in the "ceiling line" due to house settling or seasonal expansion. In many architectural traditions, it represents the "crown" of the room, symbolizing the completion of the structural envelope with a flourish of elegance. Large crown profiles can also be used to house indirect LED lighting, creating a modern "cove" lighting effect that adds ambiance to living rooms and bedrooms.
Styles and Materials: Because crown molding is rarely subjected to physical contact or abrasion, MDF and Polyurethane are extremely popular and cost-effective for this application. They are lightweight, which is a major advantage when nailing pieces overhead. However, in high-end woodworking, solid hardwoods like Cherry, Walnut, or Mahogany are used to create a "library" or "study" aesthetic that exudes luxury. Profiles range from simple "Cove" shapes, which offer a smooth concave curve, to massive, multi-tiered "Dentil" moldings that feature intricate, tooth-like blocks reminiscent of ancient Greek and Roman temples. For ultra-modern homes, simple "L-shaped" crown molding can provide a crisp, recessed shadow line that feels minimalist yet intentional.
Chair Rail Molding: Functional Protection
Originally designed to protect plaster walls from the backs of chairs in dining rooms, chair rail molding has evolved into a purely decorative element that divides a wall horizontally, providing a sense of scale and proportion. It serves as an anchor for the middle section of the wall, preventing the space from feeling like a vast, empty vertical plane.
Definition and Uses: It is traditionally installed about one-third of the way up the wall (roughly 30 to 36 inches from the floor), which aligns with the standard height of chair backs. In modern design, it serves as a visual "break," allowing homeowners to experiment with contrast—using two different paint colors, a combination of paint and wallpaper, or capping a wainscoting installation. It brings a level of human scale to rooms with soaring ceilings, making them feel more intimate and "lived-in." Furthermore, it provides a physical barrier that prevents vacuum cleaners and furniture from scuffing expensive wallpaper or delicate paint finishes.
Styles and Materials: These are often made from solid wood molding because they are at a height where they might be bumped by furniture, toys, or passing residents. Durability is key here. Styles range from simple rounded beads and "colonial" humps to more complex profiles that can be paired with additional moldings below to create a "faux-panel" look. When selecting a chair rail, ensure its profile is deep enough to "cap" any wainscoting or paneling installed beneath it, providing a clean, finished edge.
Picture Rail Molding: The Historic Solution
Common in older homes, particularly from the Victorian and Edwardian eras, picture rail molding is installed high on the wall, often level with the top of window casings or just below the crown. This type of molding is a favorite among restoration enthusiasts who want to maintain the period-correct charm of their property.
Definition and Uses: Its primary purpose is functional: to allow pictures and mirrors to be hung from hooks and cords without ever driving nails into the wall surface. This was vital in the era of lath-and-plaster walls, which were prone to crumbling and difficult to repair once punctured. Today, it is used by design enthusiasts to preserve the integrity of their walls while adding a historical, sophisticated layer to their decor. It allows for a "gallery" style display that can be rearranged in minutes without the need for a hammer, level, or spackle.
Styles and Materials: Usually slender and featuring a distinct rounded top "bead" specifically designed to accommodate the curve of a metal picture hook. These are almost exclusively made of solid wood (often Pine or Oak) to ensure they can support the significant weight of large framed art pieces over time. Because the weight of the art pulls down on the rail, it must be securely fastened into every wall stud with long finish nails or screws.
Casing Molding: Framing the View
Casing molding is the trim used to frame door and window openings, acting as the transition between the structural frame and the finished wall. It is the "eyeliner" of the room, defining the shapes of the apertures and providing a sense of continuity as you move from one space to another.
Definition and Uses: Casing covers the necessary gap between the window or door jamb and the surrounding drywall. As the most visible type of interior trim at eye level, it sets the tone for the entire room's woodwork. It provides a visual "stop" for the wall color and frames the outdoors or the transition into a new room like a piece of art. Well-designed casing can make standard, off-the-shelf doors look like custom-built architectural features.
Styles and Materials: Casing can be "mitered" (where the side and top pieces meet at 45-degree diagonal cuts) or "butted" (where square-cut side pieces are topped with a decorative lintel or header). Many homeowners choose "backband" moldings to add thickness to the outer edge of the casing for a more robust look. High-quality casing is usually wider than the baseboards to create a balanced, anchored visual frame for the home's apertures. In Craftsman-style homes, casing is often very simple and flat, while Victorian casing may feature "fluting" (vertical grooves) and ornate "rosette" blocks at the upper corners to avoid difficult miter cuts.
Panel Molding: Creating Architectural Depth
Panel molding (often associated with wainscoting or "picture frame" molding) involves creating decorative rectangles or squares on a flat wall surface to simulate the look of expensive, custom-built millwork. It is one of the most cost-effective ways to add high-end "character" to a standard new-build home.
Definition and Uses: It mimics the look of traditional raised-panel wood walls without the massive expense of installing full-thickness wall panels. By applying thin strips of molding in a grid or symmetrical pattern, you can add immense texture and shadows to a hallway, dining room, or master suite. It is one of the most effective ways to make a "plain" room look like a custom-designed space. When painted the same color as the wall, it creates a subtle, sophisticated relief; when painted a contrasting color, it becomes a bold architectural statement.
Styles and Materials: Lightweight pine or composite materials are best here, as the pieces are usually very thin and must be glued or tacked to the drywall with minimal weight to prevent sagging over time. Homeowners can use "chair rail" as the top cap and "baseboard" as the bottom to frame the panel molding sections perfectly. The "frames" themselves can vary in complexity from simple half-round beads to "ogee" profiles that feature elegant S-curves.
Choosing the Right Molding
Selecting molding is not merely a matter of picking a profile you like; it requires a strategic analysis of your home's physical and financial constraints to ensure the result looks professional and intentional. A mismatched molding choice can make a room feel uncomfortably out of proportion.
Room Style and Decor
The molding must speak the same language as the architecture to avoid a disjointed look.
Traditional: Opt for multi-tiered profiles, deep relief carvings, and stained wood molding. The complexity of the trim should match the formality of the furniture and decor. In these settings, "more is more," and layered moldings (using two or three different pieces together) can create a truly custom look.
Modern: Choose "Eased Edge" or "Square Edge" profiles with minimal detail. The goal is to create clean lines and shadows rather than ornate flourishes. Often, the molding is painted the same color as the wall to provide a subtle texture rather than a stark border. In minimalist homes, "recessed" baseboards that sit flush with the drywall are becoming a popular, albeit expensive, trend.
Rustic: Look for wider, thicker boards with visible grain patterns, such as Cedar, Knotty Pine, or reclaimed wood. These should feel substantial and "hand-hewn" to complement natural materials like stone and leather. For a true farmhouse look, "belly-band" moldings that are simple and unadorned work best.
Room Size and Ceiling Height
A common mistake in DIY molding projects is choosing trim that is out of scale with the volume of the room.
Low Ceilings (8ft): Stick to baseboards under 5 inches and modest crown moldings. Large trim will occupy too much vertical wall space, making the ceiling feel lower and the room feel "squashed" or cramped. A trick for low ceilings is to paint the molding the same color as the walls to minimize the visual "break" and make the walls appear taller.
High Ceilings (10ft+): You have the freedom—and the responsibility—to go big. Use 7-inch or even 9-inch baseboards to ground the room. In these spaces, small "builder-grade" molding looks like an afterthought and fails to define the room's boundaries effectively. You can also "stack" moldings by leaving a gap of a few inches between a crown molding and a small "picture rail" below it, then painting the gap the same color as the trim to create the illusion of a massive, expensive single piece of molding.
Budgetary Realities
Molding costs can spiral quickly if you aren't careful about material choice and labor intensity. It is important to prioritize spending on the "high-impact" rooms like the living and dining areas.
Economy: MDF (Medium Density Fiberboard) is the king of budget-friendly home improvement. It allows for elaborate, deep-cut profiles at a fraction of the cost of solid wood. Because it comes pre-primed, it also saves significantly on painting labor. However, remember that MDF cannot be used in areas where it might be exposed to standing water.
Premium: Solid hardwoods require a significant investment not just in materials, but in the precision tools (and specialized carbide-tipped blades) needed to cut them without splintering. Furthermore, stained wood requires "clear" boards without knots, which are the most expensive grade of timber available. If you want the look of wood on a budget, consider "finger-jointed" pine, which is made of real wood scraps but must be painted.
Moisture Levels and Environment
Before starting your molding installation, consider the "climate" and usage of the specific room. Wood is a living material that reacts to the environment.
Bathrooms/Kitchens: Avoid MDF at all costs in these areas. The high humidity and risk of direct water contact (from mopping or shower steam) will eventually cause the fibers to swell and delaminate, which cannot be repaired. Use PVC for a waterproof solution that won't rot, or solid, well-sealed woods like Cedar or Cypress that naturally resist moisture.
Living Areas/Bedrooms: These are "dry" zones where solid wood or MDF perform beautifully. Here, you can prioritize aesthetics and cost without worrying about environmental degradation. If you live in a climate with extreme seasonal humidity changes, ensure you allow your wood molding to "acclimate" to your home for at least 48 hours before installation to prevent shrinking or warping after it's on the wall.
Paint Grade vs. Stain Grade
This choice determines your material selection and the precision of your labor.
Paint Grade: This is the most forgiving option for DIYers. You can use MDF or Finger-Jointed Pine. Because you are applying a solid coat of paint, you can hide small gaps, slightly off-angle cuts, and nail holes with caulk and wood filler. The paint creates a seamless, unified look regardless of the underlying material's grain. High-gloss paint can make the profiles of the molding stand out, while semi-gloss is the industry standard for durability and ease of cleaning.
Stain Grade: This is for the purist and the professional. It requires clear, high-quality solid wood with consistent grain and no knots. Every cut must be absolutely perfect because you cannot use white caulk to hide mistakes; you must use color-matched wood putty, which is far less forgiving and often remains visible under a transparent stain. This grade showcases the natural beauty of the wood but demands a much higher level of craftsmanship during installation. It is often the preferred choice for historic homes and high-end executive offices where the "warmth" of real wood is the primary design goal.
Baseboard Molding and Wood Molding Installation
Successful molding installation is 10% attachment and 90% preparation. Achieving the seamless, professional look of high-end millwork requires a combination of the right equipment, meticulous measurement, and a few specialized carpentry techniques that have been perfected over centuries.
Tools and Materials: The Craftsman’s Arsenal
Before making your first cut, ensure you have the following essential items. Quality tools not only make the job faster but significantly improve the precision of your joints.
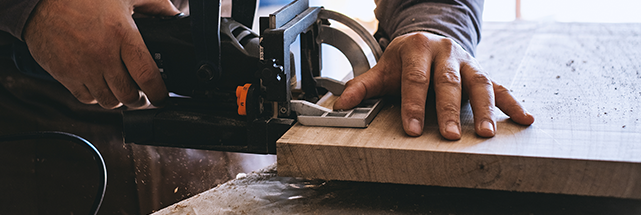
Miter Saw: The heart of any woodworking project involving trim. A compound miter saw is indispensable, allowing you to cut angles across the face (miter) and the edge (bevel) of the board simultaneously. For large-scale projects or massive crown molding, a 10-inch or 12-inch sliding compound saw is highly recommended to handle the width of modern baseboards without requiring multiple passes.
Nail Gun: While a hammer and finish nails are the traditional method, a pneumatic or cordless 18-gauge brad nailer is the industry standard for interior trim. It provides enough holding power for most molding while leaving a very small hole that is easily filled. It allows you to hold the molding perfectly in place with one hand—ensuring it is flush against the wall and floor—while instantly firing a fastener with the other, preventing the wood from shifting during the process.
Measuring Tape: In carpentry, accuracy is the difference between a seamless joint and a glaring gap. Use a high-quality tape with a stiff blade that doesn't sag. Always measure to the nearest 1/16th of an inch, and remember to measure "long to long" or "short to short" depending on the type of miter joint you are creating.
Level: Walls and floors are rarely perfectly straight, especially in older homes. A 4-foot level is essential to ensure your chair rails and picture rails are perfectly horizontal. Do not rely on the distance from the floor or ceiling, as these surfaces often slope; instead, trust the bubble in your level to maintain a true horizontal line throughout the room.
Caulk and Caulk Gun: Specifically, "Painter's Caulk" or a siliconized acrylic latex. This is the secret weapon of the professional. It is used to fill the hairline gaps between the molding and the wall or between two pieces of trim. Once painted, it creates a seamless, "built-in" look that makes the molding appear as though it grew directly out of the wall.
Wood Filler: Essential for hiding nail holes and minute gaps in the joints. For paint-grade molding, a standard water-based putty is sufficient. For stain-grade wood, you must use a specialized filler that matches the specific wood species to ensure it disappears under the final finish.
Safety Glasses and Ear Protection: Miter saws are extremely loud and eject high-velocity wood chips and sawdust. Never operate power tools without proper PPE. Additionally, a dust mask or respirator is highly recommended when cutting MDF, as the dust contains resins that should not be inhaled.
Step-by-Step Installation Guide
Measuring and Cutting: The "Measure Twice" Rule
Start by measuring the perimeter of the room. Always add 10-15% to your total to account for waste, "practice" cuts, and mistakes. When cutting baseboard molding, it is helpful to mark the wall studs with a piece of painter's tape or a light pencil mark so you know exactly where to drive your nails. For long walls where a single board won't reach, use a "scarf joint"—cutting both boards at a 45-degree angle so they overlap, making the seam much easier to hide with sanding and filler than a square-cut butt joint.
Attaching the Molding: Finding the Studs
Place the molding against the wall and ensure it is seated tightly against the floor (for baseboards) or ceiling (for crown). Fire two nails into every stud—one near the top of the molding and one near the bottom. This prevents the wood from "cupping" or pulling away from the wall over time. If you are installing over a concrete floor or in a basement where studs might be difficult to reach, you may need to use a high-strength construction adhesive in addition to nails to ensure a permanent, rattle-free bond.
Coping vs. Mitering Corners: The Professional Secret
This is the most critical technical decision in molding installation.
Mitering: This involves cutting both boards at a 45-degree angle to meet in a 90-degree corner. While this works well for outside corners (where the molding wraps around a wall), it often fails on inside corners because walls are rarely exactly 90 degrees. This results in a gap at the front or back of the joint that is difficult to hide.
Coping: The gold-standard professional method for inside corners. You cut the first board square to the wall. The second board is mitered at 45 degrees to reveal the shape of the profile, and then you use a hand-held "coping saw" to cut away the back of the wood along that revealed profile line. This allows the second board to "nest" perfectly over the face of the first board. The beauty of a coped joint is that it remains tight even if the walls are out of square or if the house settles and shifts over time.
Filling Nail Holes and Seams
Once the wood is securely fastened to the wall, you will be left with hundreds of tiny nail holes. Use a small amount of wood filler on your fingertip to press the putty into each hole, leaving it slightly "proud" (protruding) rather than flush. This accounts for the slight shrinkage that occurs as the putty dries, allowing you to sand it perfectly flat later. For the joints where two boards meet, use a thin layer of filler to bridge the gap and create a continuous surface.
Sanding and Painting/Staining
After the filler has thoroughly dried, use 220-grit sandpaper to smooth out the holes and seams until they are invisible to the touch. Vacuum away all dust and wipe the molding with a tack cloth before applying your finish.
For Painting: Use a high-quality angled sash brush with synthetic bristles for a smooth, stroke-free finish. Apply a high-quality primer first (even if the wood is pre-primed, a fresh coat ensures better adhesion), followed by two coats of semi-gloss or high-gloss trim paint. Painting the trim after installation allows you to paint over the caulk and filler, hiding all your installation work under a uniform, durable shell.
For Staining: This process is more delicate. Apply the stain with a clean rag or foam brush, working in the direction of the grain. Let it sit for the manufacturer's recommended time (longer for deeper color) and wipe away the excess completely. Once the stain is fully dry, finish with a minimum of two coats of clear polyurethane or lacquer topcoat. This not only adds depth and shine but protects the wood molding from the daily abuse of vacuums, pets, and foot traffic.
|
Task
|
DIY Difficulty
|
Time Commitment
|
Key Tool
|
|
Straight Runs
|
Easy
|
Low
|
Measuring Tape
|
|
Outside Miters
|
Medium
|
Medium
|
Miter Saw
|
|
Inside Coping
|
Hard
|
High
|
Coping Saw
|
|
Finishing (Caulk/Paint)
|
Medium
|
High
|
Caulk Gun
|
Maintenance and Care of Wood Molding
Once your interior trim is installed, maintaining its pristine appearance requires regular attention. Molding is often the first part of a wall to show wear due to its proximity to the floor and its function as a protective barrier. Proper care ensures your investment continues to add value and beauty to your home for decades.
Cleaning: Preservation Through Gentle Care
Cleaning methods vary significantly depending on the material and the finish applied to the molding.
Cleaning Painted Molding: Painted surfaces, particularly those with a semi-gloss or high-gloss finish, are relatively durable. Use a microfiber cloth or a vacuum with a soft brush attachment to remove dust weekly. For deeper cleaning, mix a few drops of mild dish soap in a bucket of warm water. Dampen a soft cloth—never soak it—and wipe the surface gently. Immediately dry the molding with a clean towel to prevent moisture from seeping into any hairline cracks in the paint or caulk, which could cause the wood or MDF to swell.
Cleaning Stained Wood Molding: Stained wood is more sensitive to harsh chemicals. Avoid all-purpose cleaners or those containing bleach or ammonia, as they can strip the protective polyurethane topcoat and dull the wood's natural luster. Instead, use a specialized wood cleaner or a simple mixture of warm water and a small amount of white vinegar. Always wipe in the direction of the grain. To revitalize the shine of older stained trim, you can periodically apply a high-quality furniture polish or lemon oil, which keeps the wood hydrated and prevents it from cracking in dry winter months.
Recommended Cleaning Products: For high-traffic areas prone to scuffs (like mudrooms or hallways), a "magic eraser" can be used on painted trim, but use it sparingly as it is slightly abrasive. For general dusting, electrostatic dusters are excellent for reaching the intricate grooves of Victorian or Colonial profiles without moving dust back into the air.
Repair: Restoring the "Like New" Look
Even with the best care, accidents happen. Knowing how to perform minor repairs can save you the cost of a full molding installation replacement.
Fixing Cracks and Dents: Small dents in solid wood can sometimes be "steamed" out. Place a damp cloth over the dent and touch it with a hot iron for a few seconds; the moisture causes the wood fibers to swell back into place. For cracks or larger gouges, use wood filler. Overfill the area slightly, let it dry completely, and sand it flush with 220-grit sandpaper. If the crack is between the molding and the wall, simply remove the old, brittle caulk and apply a fresh bead of flexible painter's caulk.
Replacing Damaged Sections: If a section of baseboard is severely rotted from water damage or chewed by a pet, you may need to replace a segment. Use a sharp utility knife to cut through the caulk and paint along the top edge to prevent tearing the drywall paper. Use a pry bar to gently pop the damaged piece away from the studs. Cut a new piece of matching molding to fit the gap—using scarf joints at the ends for a seamless transition—and follow the standard installation steps of nailing, filling, and painting.
Dealing with House Settling: If your miter joints have opened up due to the house settling, do not try to re-nail them. Instead, clean out any dust from the gap and fill it with a color-matched wood putty (for stain) or flexible caulk (for paint). This allows for a small amount of future movement without the joint cracking open again.
|
Problem
|
Repair Method
|
Skill Level
|
|
Dust Buildup
|
Vacuum w/ Brush Attachment
|
Beginner
|
|
Scuff Marks
|
Mild Soap & Damp Cloth
|
Beginner
|
|
Nail Hole Pop-out
|
Wood Filler & Sanding
|
Intermediate
|
|
Water Swelling
|
Replace Section
|
Advanced
|
The Importance of Preventative Maintenance
Beyond regular cleaning and necessary repairs, preventative maintenance is the key to extending the lifespan of your wood molding. During humid seasons, it is highly recommended to use a dehumidifier to prevent solid wood baseboards from absorbing excess moisture and warping. In dry winter months, maintain consistent indoor humidity to keep the wood from drying out and cracking. Additionally, leaving a small gap between furniture and walls can effectively prevent physical impacts from desk corners or chair backs from denting the trim and paneling.
While most minor damage can be fixed with filling and repainting, a full replacement of your molding installation may be more cost-effective if you discover widespread mold, severe water rot, or if the existing trim style is significantly outdated compared to your overall decor. Modern PVC and high-density polyurethane materials offer superior waterproof and insect-resistant options. With the right material selection and diligent care, your interior molding will serve not only as a barrier protecting your walls but as an artistic element that enhances your overall quality of life.

 English
 한국어
한국어 Español


